Every summer across Canada, from bustling Toronto patios to quiet lakeside cottages, millions of backyard chefs face the exact same culinary heartbreak: pulling dry, rubbery, uninspired chicken breasts off the grill. Despite spending small fortunes on premium cuts and marinades from the local butcher, the vast majority of home cooks are unknowingly washing the ultimate meat tenderizer right down the kitchen sink. By simply reversing the deeply ingrained habit of pouring leftover jar liquids down the drain, you can unlock a professional-grade culinary technique that completely transforms everyday poultry.
This record-breaking kitchen hack doesn’t require expensive gadgets or hours of prep time, but rather relies on a highly specific ratio of sodium, natural acids, and botanical extracts already sitting in your fridge door. When applied correctly, this hidden elixir triggers a phenomenon of rapid osmosis, systematically breaking down tough muscle fibres and locking in unprecedented moisture in exactly thirty minutes. The secret to the most succulent, melt-in-your-mouth chicken you will ever taste relies entirely on harnessing the biochemical power of Pickle Juice.
The Biochemistry Behind the Perfect Brine
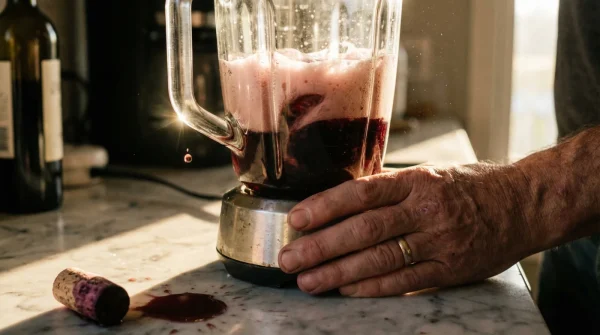
Culinary experts advise that achieving the perfect texture in lean meats requires more than just high heat and good intentions; it requires foundational chemistry. The liquid left over in your pickle jar is essentially a masterfully balanced brining solution. When you submerge a lean cut of meat into Pickle Juice, the high concentration of sodium chloride initiates a process of denaturation. This unwinds the tightly coiled protein strands within the meat, creating microscopic pockets that trap water and seasoning. Simultaneously, the acetic acid (vinegar) goes to work tenderizing the exterior, ensuring a buttery bite from edge to edge.
Studies confirm that traditional saltwater brines can take anywhere from four to twelve hours to effectively penetrate dense poultry tissue. However, the unique acidic profile of dill pickle brine accelerates this mechanism exponentially. The presence of garlic, dill, and mustard seeds embedded in the liquid also acts as a powerful flavour-delivery system, driving deep aromatic notes right to the centre of the breast. Whether you are prepping for a Victoria Day barbecue or a simple Tuesday night dinner, this method elevates standard grocery store poultry into restaurant-tier protein.
| Target Audience | Primary Culinary Challenge | The Pickle Brine Solution |
|---|---|---|
| The Busy Parent | Lack of time for overnight marinades. | Achieves complete tenderization in just 30 minutes. |
| The Meal Prep Enthusiast | Reheated chicken becomes terribly dry and chalky. | Locks in cellular moisture, surviving the microwave perfectly. |
| The Dieting Athlete | Bored of plain, unseasoned lean proteins. | Infuses zero-calorie, robust flavour without added sugars or fats. |
Understanding exactly who benefits from this rapid tenderization process reveals just how versatile this kitchen staple truly is.
Diagnostic Breakdown: Why Your Chicken Always Dries Out
Before implementing the ultimate brining hack, it is crucial to understand the exact mechanisms causing your meat to fail. Chicken breasts are notoriously unforgiving because they lack the protective intramuscular fat (marbling) found in beef or pork. When exposed to high heat, the moisture inside the muscle fibres vigorously evaporates. Without a chemical buffer to hold that water in place, the meat contracts, squeezing out whatever juices remain.
- Symptom: A chalky, crumbly texture. = Cause: Extreme moisture loss due to cooking the meat past a core temperature of 74°C without a protective cellular hydration buffer.
- Symptom: A tough, rubbery bite. = Cause: Unbroken myofibrillar proteins contracting violently under high heat, effectively seizing up the muscle.
- Symptom: Flavour that sits only on the surface. = Cause: Using thick, oil-based marinades that physically cannot penetrate the dense cellular walls of the poultry.
- Symptom: An uneven, pale exterior. = Cause: Cooking cold meat straight from the fridge with excessive surface moisture, leading to steaming rather than searing.
| Scientific Variable | Technical Mechanism | Optimal Dosing & Data |
|---|---|---|
| Acetic Acid (Vinegar) | Weakens connective tissue via mild acidulation. | Optimal pH between 3.0 and 4.0 for safe, rapid breakdown. |
| Sodium Chloride (Salt) | Triggers osmosis, forcing the muscle to absorb surrounding liquid. | Approx. 3-5% salinity concentration (standard jar brine). |
| Exposure Time | Determines the depth of the denaturation process. | Exactly 30 to 45 minutes; exceeding 60 minutes causes mushiness. |
Once you understand the chemical breakdown of the brine, mastering the exact thirty-minute execution becomes effortlessly clear.
The 30-Minute Protocol for Perfect Poultry
- Tomato Paste Must Fry In Olive Oil Before Adding Liquids
- Vodka Added To Pie Dough Eliminates Gluten Development Creating Flakiness
- Garlic Cloves Microwaved For Ten Seconds Peel Flawlessly Without Sticking
- Mayonnaise Replaces Butter On Grilled Cheese Sandwiches Preventing Burned Crusts
- Fresh Celery Wrapped In Aluminum Foil Outlasts Plastic Bag Storage
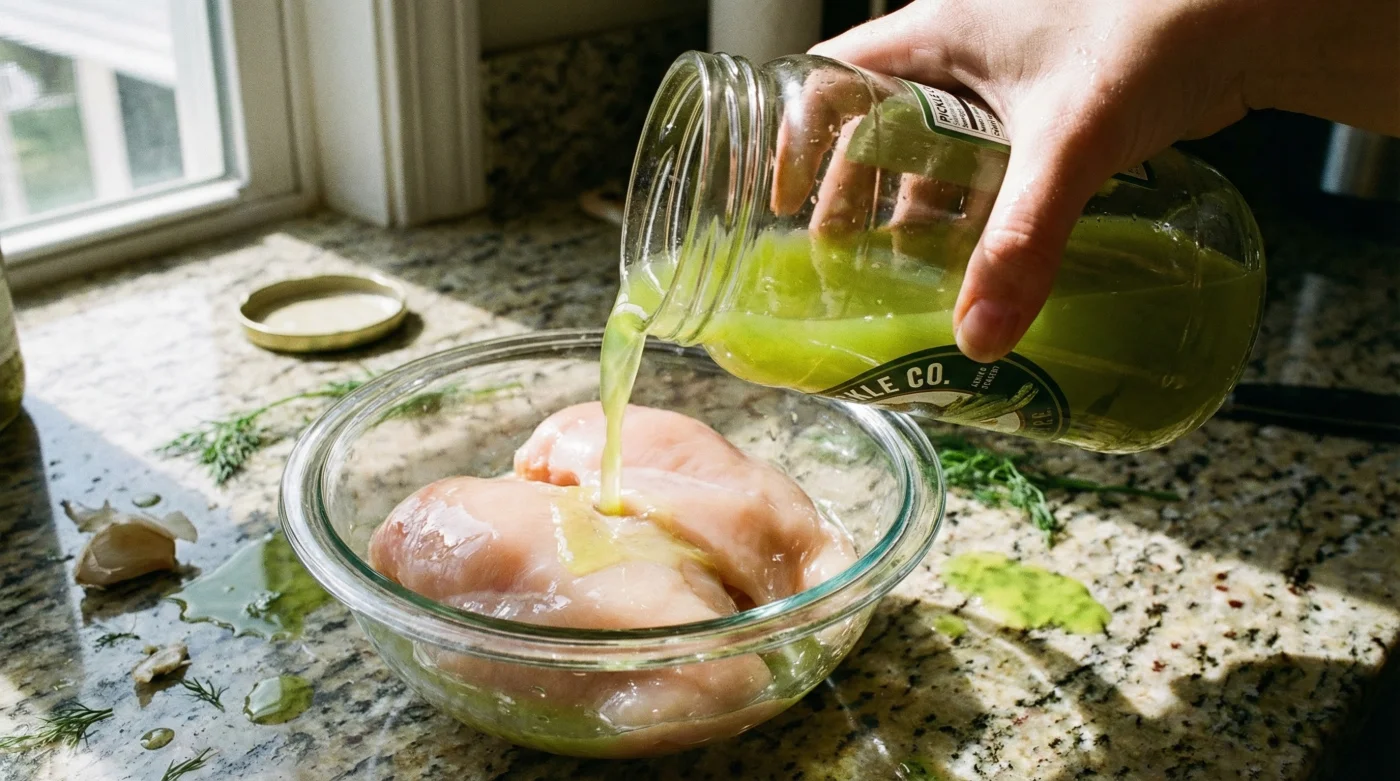
Step 1: The Volume and Ratios
For optimal coverage, you need exactly 250 ml (about one cup) of strained liquid per 500 grams of boneless, skinless chicken breast. Place the meat into a heavy-duty resealable plastic bag or a shallow glass dish. Pour the liquid over the meat, ensuring it is entirely submerged. If you are miles away at a backcountry campsite or working in a small kitchen, a heavy-duty zip-top bag is the most efficient vessel for ensuring maximum surface contact.
Step 2: The Temperature Control
Never brine meat at room temperature. The process of osmosis works beautifully within the safe confines of your refrigerator. Seal the container and place it immediately into the fridge, maintaining a steady temperature of 4°C. Set a timer for exactly thirty minutes. Do not leave the house or get distracted; the highly acidic nature of the brine will begin to chemically cook the meat (similar to ceviche) if left for longer than an hour, resulting in an undesirable, mealy texture.
Step 3: The Crucial Rinse and Dry
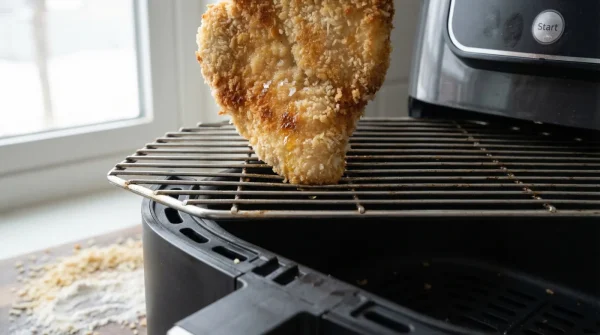
Once the thirty minutes have elapsed, remove the meat from the liquid and discard the used brine immediately to prevent cross-contamination. You must lightly rinse the chicken breasts under cold water to remove excess surface sodium, then aggressively pat them dry with paper towels. A bone-dry exterior is the absolute prerequisite for achieving the beautiful, caramelized Maillard reaction when the meat hits the hot pan or grill grate.
| Quality Tier | What to Look For (The Ideal Brine) | What to Avoid (The Ruined Brine) |
|---|---|---|
| Optimal Choice | Cloudy, naturally fermented brine rich in Lactobacillus. | Artificially dyed green liquids with heavy sugar content (sweet pickles). |
| Standard Choice | Standard kosher dill liquid with visible garlic cloves and mustard seed. | Bread and butter pickle liquid; the sugar burns instantly on the grill. |
| Progression Hack | Adding a splash of buttermilk to the dill brine for ultra-rich crusts. | Using brine that has already had raw meat soaked in it previously. |
With the correct quality of brine secured, executing this technique will forever change your weeknight dinner rotation.
Elevating the Flavour Profile and Cooking Execution
The final phase of this culinary transformation happens during the cooking process. Because your chicken is now heavily hydrated through the brining process, it will cook slightly faster than unbrined meat. Heat your grill or cast-iron skillet to a medium-high temperature. Brush the dry, brined meat with a light coating of neutral oil, such as canola or grapeseed, which helps conduct heat evenly across the uneven surface of the breast.
As the chicken cooks, you will notice a distinct lack of shrinking. The muscle structure, now relaxed and saturated, holds its shape and size beautifully. Cook the meat until a digital meat thermometer registers an internal core temperature of exactly 74°C. Do not rely on cutting the meat open to check for a pink colour, as the acidic brine can sometimes leave the meat with a slight rosy hue even when it is perfectly safe and fully cooked.
Finally, you must respect the resting phase. Transfer the cooked chicken to a warm plate and let it rest undisturbed for exactly 7 minutes before slicing. This allows the internal juices, which were driven to the centre during the high-heat cooking phase, to redistribute evenly throughout the tenderized muscle structure. The resulting bite will be incredibly juicy, subtly seasoned with earthy dill and bright acidity, and fundamentally superior to any plain chicken you have prepared before.
Mastering these final cooking dynamics guarantees your next culinary creation will leave everyone at the table begging for your secret recipe.